




Comment broder leaf stitch
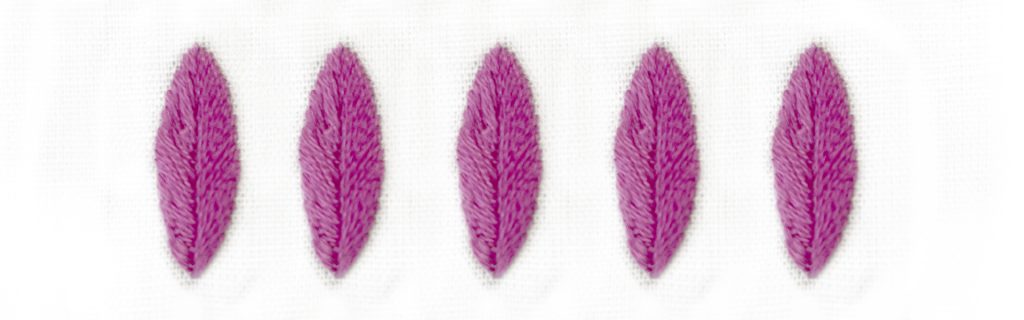
Tutoriels de points de broderie > Tous les points > leaf stitch
The leaf stitch, step by step
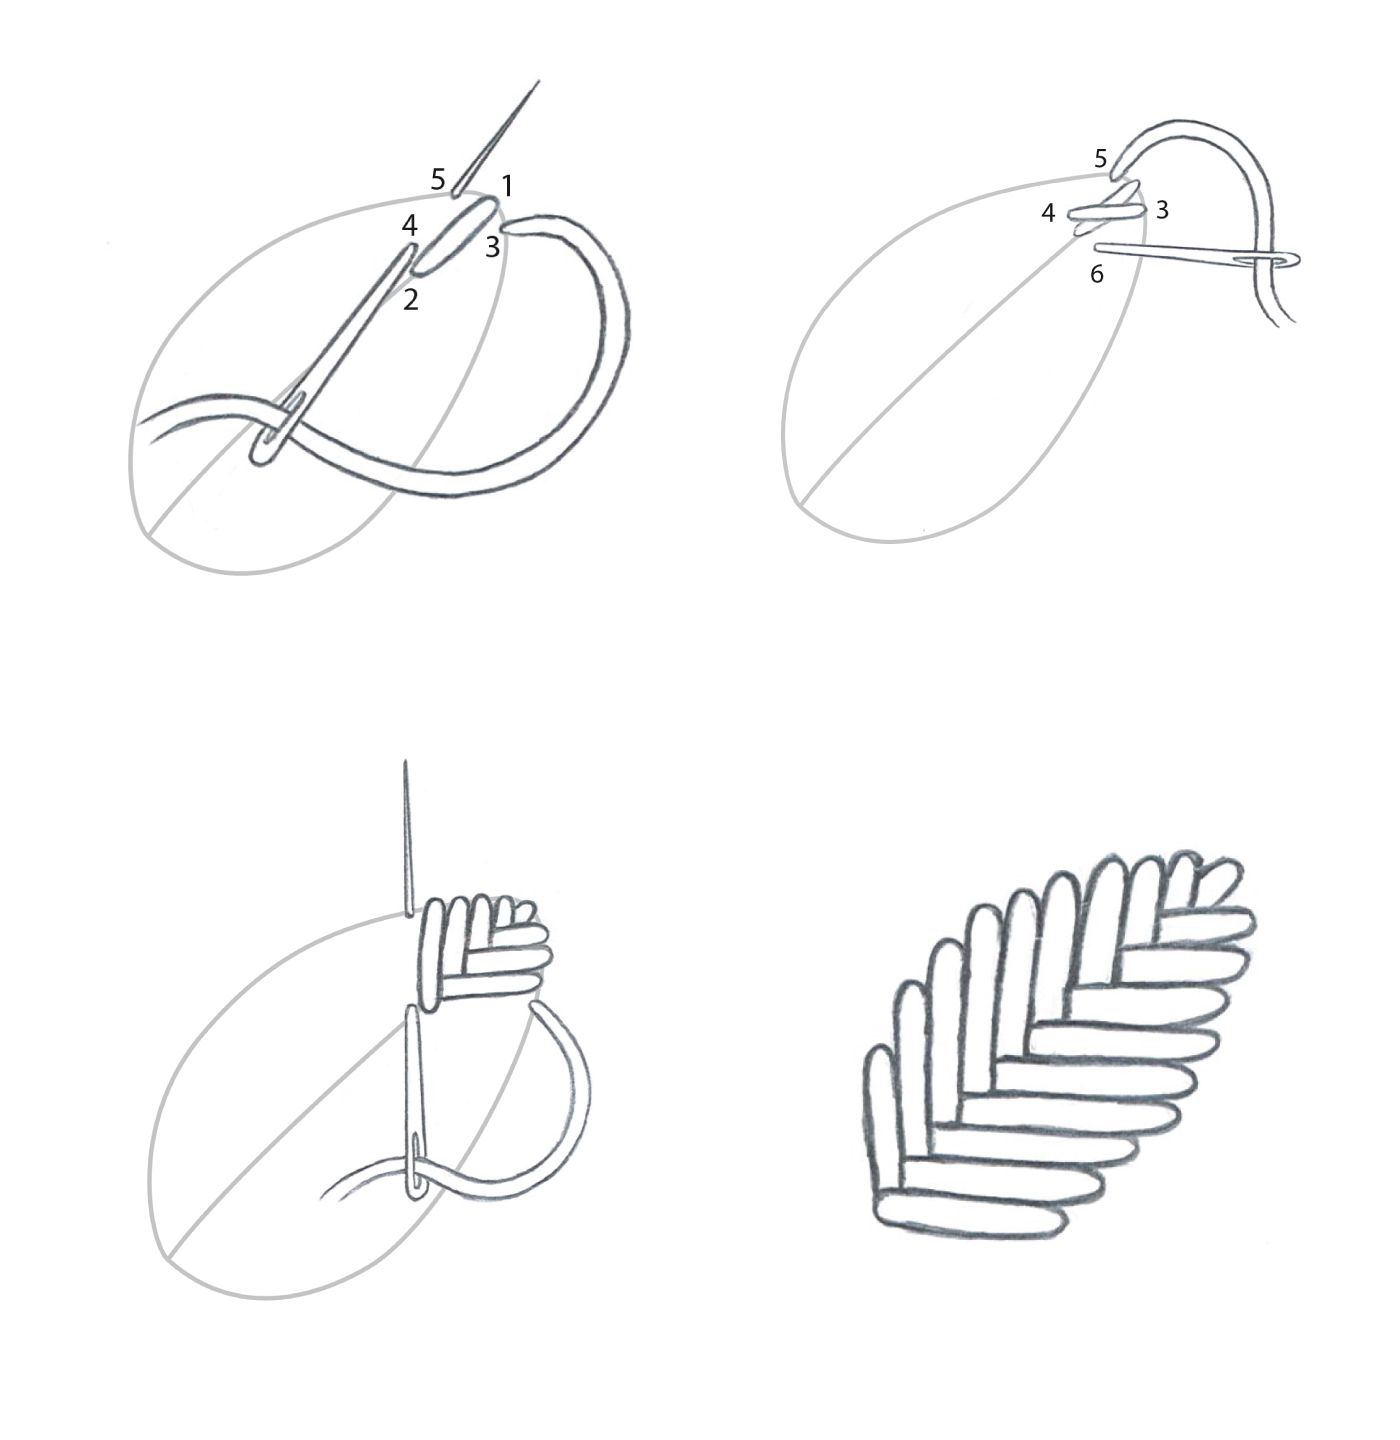
We guide you here, step by step, to embroider the leaf stitch.
This filling stitch creates a supple, lightly raised surface through alternating stitches worked around a central vein.
1 – Forming the tip of the leaf
Bring the needle up on the right side of the fabric at A, at the tip of the leaf. Insert at B on the central line to form the first straight stitch that marks the tip.
2 – Beginning the alternation
Bring the needle up on the right edge of the leaf at C, close to the tip. Insert on the other side, crossing the central line at D, without reaching the opposite edge. Bring the needle up on the left edge at E and repeat the same movement in the opposite direction.
3 – Filling the leaf
Continue alternating stitches from right to left then from left to right, placing them evenly one below the other. Progress from tip to base, adapting the length of the stitches to the shape. Pass the thread to the wrong side of the fabric and secure it under the stitches already worked.
FOR RIGHT-HANDED EMBROIDERERS: Work from tip to base, starting with a branch on the right, then alternating left and right.
FOR LEFT-HANDED EMBROIDERERS: Work from tip to base, starting with a branch on the left, then alternating right and left.

Tips for a perfect leaf stitch
Direction of work: Always work from tip to base so that the branches fall naturally around the vein and the leaf takes shape progressively.
Central vein: Each branch must anchor on the central line without crossing it, to keep a clean, visible axis throughout the filling.
Alternation regularity: Keep the branches evenly spaced and their angle parallel on both sides to produce a consistent, even surface.
Adapting to the shape: Shorten the stitches at the tip and base, and lengthen them slightly in the middle to follow the outline of the leaf precisely.
Thread tension: Pull the thread gently on each stitch to achieve a supple surface without puckering the fabric or flattening the relief.
Result
On the front: A leaf with a regular, supple filling, lightly raised, with a visible central vein that structures the motif.
On the back: A succession of small diagonal straight stitches aligned on either side of the central axis.
EXPLORE FURTHER

The leaf stitch, an essential stitch for learning hand embroidery
The leaf stitch is used to fill botanical shapes by following their natural structure, allowing it to adapt to all sizes and silhouettes of leaves.
It holds a key place in traditional embroidery for bringing foliage, petals, and organic forms to life with precision and lightness.
It appears in crewel work, botanical needlework, and floral compositions where the central vein adds realism and structure to the motif.

The leaf stitch: a filling technique built by alternating diagonal straight stitches on either side of a central axis.
It is worked by stitching successive branches from tip to base, adjusting their length to the width of the shape at each row.
This methodical construction produces a dense, balanced, lightly textured surface that faithfully captures the vein of a leaf.
It is used in hand embroidery to give body and a natural quality to the botanical elements of a composition.
DISCOVER OTHER STITCHES

Why learn the leaf stitch?
• structure a regular filling around a visible central axis
• master the precise alternation of branches and their progressive adaptation to the shape
• develop control of stitch length in response to the outline of the motif
• enrich floral and botanical compositions with realistic, supple foliage
Learn the leaf stitch with Un Chat dans l’Aiguille
At Un Chat dans l’Aiguille, the leaf stitch is taught step by step with clear, structured guidance.
Our approach to teaching is part of a complete hand embroidery stitch encyclopaedia, designed to support every embroiderer on their journey.
It allows you to progress at your own pace whilst building precision, consistency, and confidence in hand embroidery.