




Comment broder twisted chain stitch
Tutoriels de points de broderie > Tous les points > twisted chain stitch
The twisted chain stitch, step by step
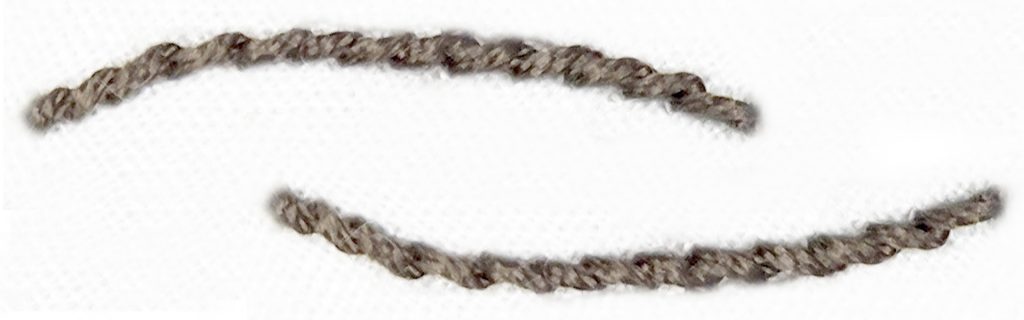
We guide you here, step by step, to embroider the twisted chain stitch.
This variation of chain stitch forms a line of slightly twisted loops by offsetting the needle entry point to the side of the previous loop.
1 – Form the first loop
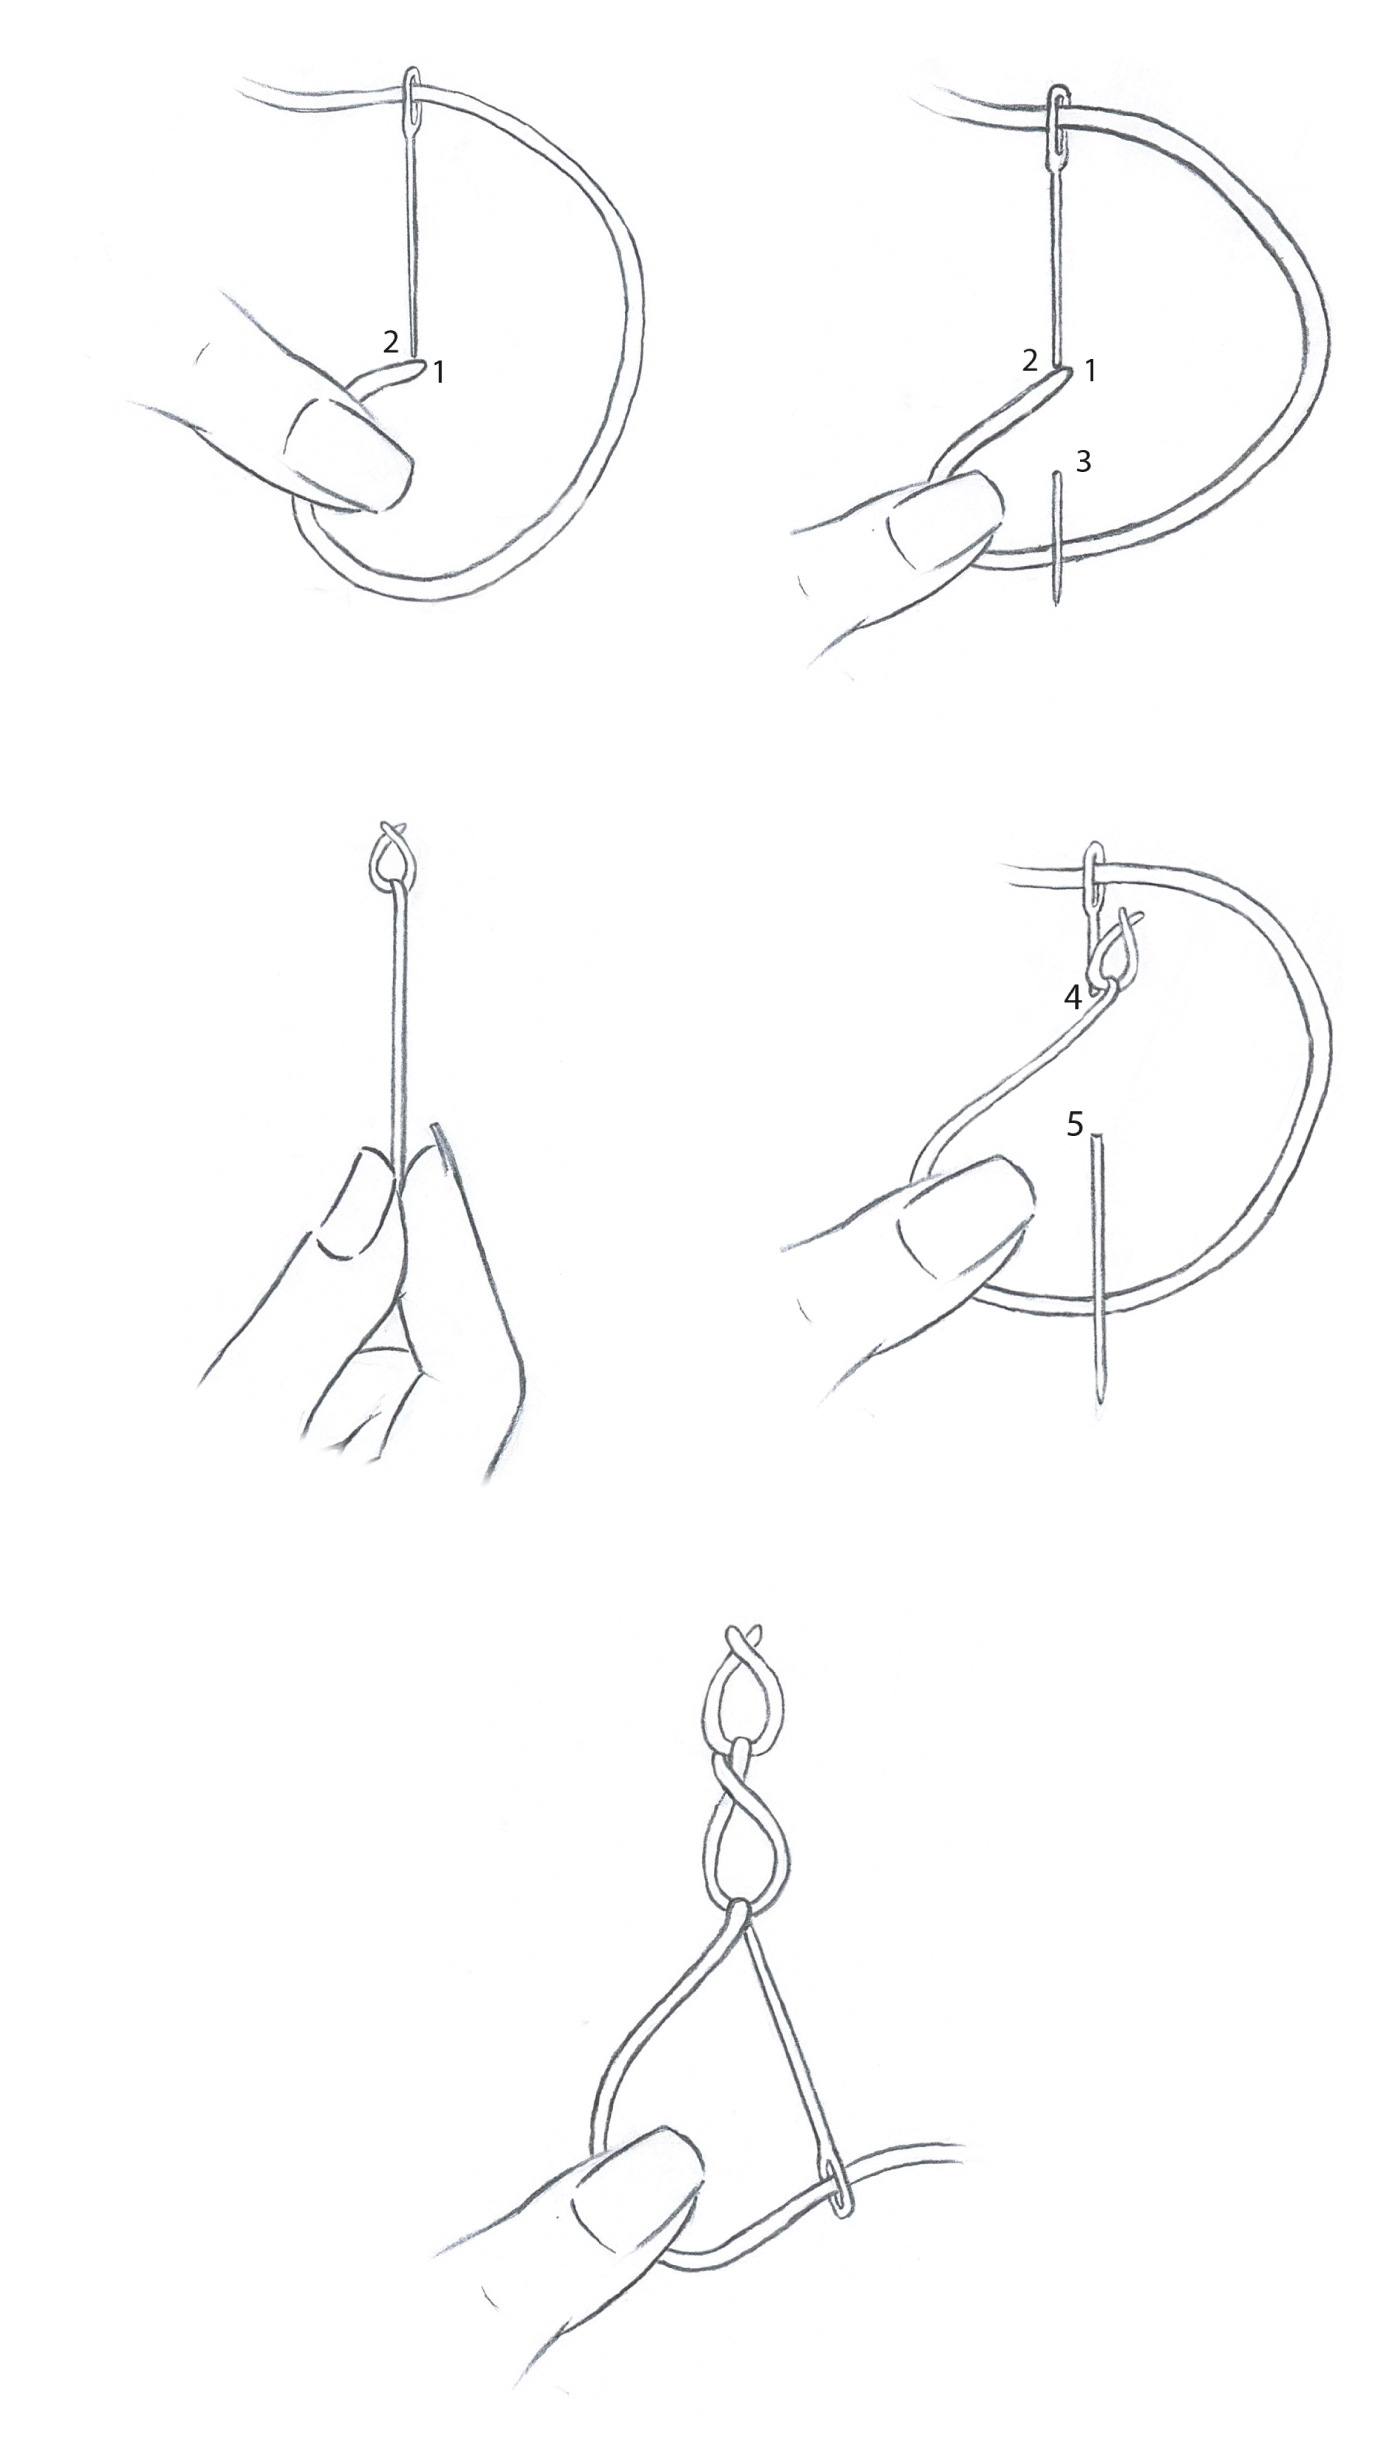
Bring the needle up at A. Hold the thread under your thumb. Insert at B, slightly to the left of A, outside the loop. Bring up at C a little further along the line, keeping the thread under the needle tip. Pull gently to form the first twisted loop.
2 – Form the following loops
Insert to the left of the base of the previous loop. Bring up further along the design line, keeping the thread under the needle tip. Pull gently. For a more pronounced twist, insert higher into the previous loop — the rope effect will be more marked.
3 – Finish the line
Repeat along the full length of the design line, keeping an even spacing between each loop. Anchor the last loop with a small straight stitch. Pass the thread to the back of the fabric and secure it under the stitches already worked. ___________ FOR RIGHT-HANDERS: Work from top to bottom, inserting to the left of the base of the previous loop at each stitch.

Tips for a perfect twisted chain stitch
Principle: Always insert to the left of the base of the previous loop — this consistent offset produces the characteristic twist of the stitch.
Twist intensity: The higher you insert into the previous loop, the more pronounced the rope effect will be — adjust the position according to the result you want.
Thread position: Always keep the thread under the needle tip before pulling so the loop forms and twists correctly.
Tension: Pull gently and consistently at each loop to achieve an even twist along the full length of the line.
Thread choice: A thicker thread accentuates the twisted effect and gives the line more volume — a finer thread produces a more delicate result.
Result
On the front: A line of slightly twisted loops forming a dynamic decorative effect.
On the back: A succession of small stitches corresponding to the anchor points.
EXPLORE FURTHER

The twisted chain stitch, an essential stitch for learning hand embroidery
This stitch is ideal for bringing movement and dynamism to an embroidered line.
It fits naturally into traditional embroidery to work stems, cords, or decorative borders with a rope-like quality.
The intensity of the twist can be adjusted according to needle placement, making it a highly adaptable stitch.

The twisted chain stitch: a dynamic variation within the chain stitch family.
Its construction relies on offsetting the needle entry point to the left of the base of each loop, which creates a progressive, regular twist.
It produces a line with a characteristic raised quality, halfway between a chain stitch and a corded line.
An expressive and precise stitch, ideal for enriching linear designs in hand embroidery.
DISCOVER OTHER STITCHES

Why learn the twisted chain stitch?
• understand how a simple offset of the entry point changes the appearance of a line
• master precise needle placement to control the intensity of the twist
• develop stitch regularity for an even, well-structured line
• enrich decorative designs with an adjustable rope effect
Learn the twisted chain stitch with Un Chat dans l’Aiguille
At Un Chat dans l’Aiguille, the twisted chain stitch is taught step by step with clear, structured guidance.
Our approach to teaching is part of a complete hand embroidery stitch encyclopaedia, designed to support every embroiderer on their journey.
It allows you to progress at your own pace whilst building precision, consistency, and confidence in hand embroidery.